|
One of the key aspects of mastering Digital retouching in PhotoShop is
to learn how to select complex shapes. Once you master that. you can do
virtually anything, do photo montage, localized color correction, burning,
dodging, blurring anything. PhotoShop offers various selection tools,
so there are various methods of selecting shapes.
Magic Wand
Color Range
Lasso
Pen
Quick Mask
Extract
 Magic Wand Magic Wand
The most easy to use selection tool. PhotoShop's Magic It selects pixels
based on their color similarities. There are three options associated
with Magic Wand

Tolerance: (0-255) The tolerance
value selects how much variation range from the selected color will get
selected. For a value of 0, the Magic wand will select regions with exactly
the same color. Default value for Tolerance is 32, meaning that 32 similar
lighter tones and 32 similar darker tones will be selected.
Anti-alised: When checked, it makes
the selection edges smooth.
Contiguous: When checked, the Magic
Wand will select only adjacent areas using the same colors, otherwise,
all pixels using the same colors will be selected.
Use All Layers: To limit the selection
to the active layer, keep this box unchecked. If you check it, then Magic
Wand will select colors using data from all the visible layers.
When working with an image, you may need to adjust these values to gain
the best accuracy for your selection.
Color Range
This tool is very similar to the Magic Wand. Using a dropper, you pickup
the color you want to select. You will be able to see the resultant selection
as a black and white mask as shown below. By moving the Fuzziness Slider,
you can increase the selection area by increasing the fuzziness or the range
of selected colors.
 Lassos Lassos
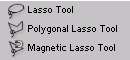
There are three lasso tools. They come handy in
different situations.
Lasso Tool
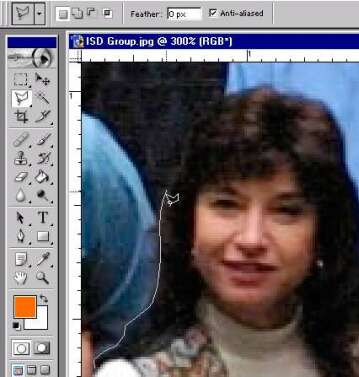
It is useful when you want to select some area by freehand drawing. This
tools is useful when you need to select an area not too accurately as it
is difficult to trace a border very accurately by simple freehand drawing.
 
Polygonal Lasso Tool
If you prefer to draw small segments of connected lines instead a freehand
drawing then it is the tool for you. In fact, most of the complex shapes
can be traced accurately by using this tool. The trick is to zoom in the
area you want to trace and carefully keep of tracing by drawing small segments
at a time.
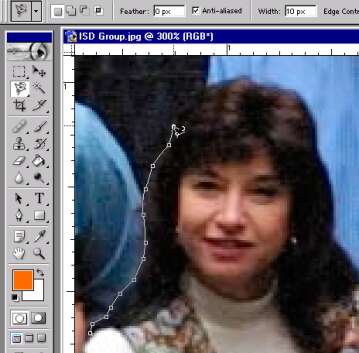
Magnetic Lasso Tool
This Lasso tool has an automatic edge detection, which causes it to snap
at the edge of two different colors, so that you need not have to trace
the border very accurately. All you need to do is to click to hook on the
starting point and then move the Magnetic lasso tool at close proximity
of the edge or border you want to trace and it does the rest. It it tries
to wander from the edge, you can guide it by clicking an anchor point. This
tool is effective if thew picture has very well defined edges. For pictures
with fuzzy edges, you have to employ other selection methods.
This tool has a number of settings, similar to Magic Wand

Feather: Blurs edges by building a transition
boundary between the selection and its surrounding pixels. This blurring
can cause some loss of detail at the edge of the selection. Higher the number
you select, wider will be the feathering effect. The default value is 0
pixel, which will cause no feathering.
Anti-alised: If this box is checked,
then PhotoShop will smooth the jagged edges of a selection by appropriately
changing the color of the pixels at the selection border. Since only the
color of the edge pixel change, no detail will be lost in the picture. Most
of the time you may like to turn it on.
Width: To specify a detection width,
enter a pixel value for Width. The magnetic lasso detects edges only within
the specified distance from the pointer. To specify the lasso's sensitivity
to edges in the image, enter a value between 1% and 100% for Edge Contrast.
A higher value detects only edges that contrast sharply with their surroundings;
a lower value detects lower-contrast edges. On an image with well-defined
edges, try a higher width and higher edge contrast, and trace the border
roughly. On an image with softer edges, try a lower width and lower edge
contrast, and trace the border more precisely.
Frequency: To specify the rate at which
the lasso sets fastening points, enter a value between 0 and 100 for Frequency.
A higher value anchors the selection border in place more quickly.
Pen Pressure: This option comes handy
if you use a graphic tablet. When the option is selected, an increase in
stylus pressure will decrease the edge width.
 Pen Pen
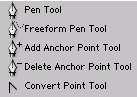
There are three types of Pen tools
- Freeform Pen Tool
- Magnetic Pen Tool
- Pen Tool
 Freeform and
Magnetic Pen tools are used just like Lasso and Magnetic Lasso way. The
simple Pen tool is used just like Polygonal Lasso tool.The difference
between a Lasso and a Pen Tool is: Pen tool puts path instead of selection
marquee. We can however convert this path into a selection marquee Freeform and
Magnetic Pen tools are used just like Lasso and Magnetic Lasso way. The
simple Pen tool is used just like Polygonal Lasso tool.The difference
between a Lasso and a Pen Tool is: Pen tool puts path instead of selection
marquee. We can however convert this path into a selection marquee
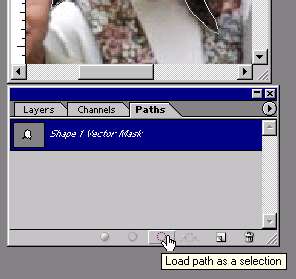
Paths into Selections
To turn a path into a selection, choose the Make Selection command from
the Paths palette or click on the dotted circle load path as selection
Button in the Paths window.
Quick Mask
Most of the time all the above tools are used for rough cutting the selection.
As you can see the selected results, they still show some unwanted backgrounds
and the cutting borders are not really clean. So if you use those rough-cut
images in photomontage, even a untrained eye can be able to detect they
are clipped images.
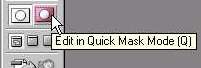 PhotoShop Quick
Mask helps to do the final cut selection from the rough-cut made by Marquee,
Lasso or Pen tools. Once you have the rough-cut selection ready, press
the Quick Mask button, which is located at the bottom of the Tool bar
as shown in the figure. PhotoShop Quick
Mask helps to do the final cut selection from the rough-cut made by Marquee,
Lasso or Pen tools. Once you have the rough-cut selection ready, press
the Quick Mask button, which is located at the bottom of the Tool bar
as shown in the figure.
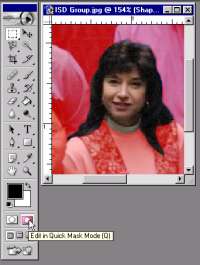
This will turn the unselected portion of the photograph tinted into red.
Now you can zoom in the picture and use various painting tools like Brush,
Spray Can, Pencil to apply or remove the mask to fine-tune the selection.
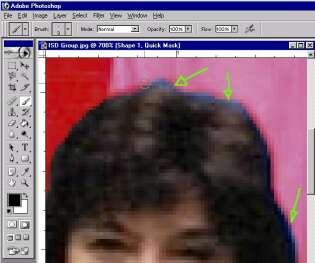
Use black ink to paint in more mask and white ink to remove it. I have
used 5 pixel wide Brush to cover up the bluish highlight on the hair border
as shown below
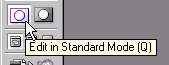 After
creating the proper mask, click the standard mode button at the bottom
of the toolbar. This will convert the Quick Mask into a Selection Marquee.
You can not use this refined Selection Marquee to cut or copy the selected
picture area into another photograph or do any PhotoShop editing or filter
operation in that selected part. After
creating the proper mask, click the standard mode button at the bottom
of the toolbar. This will convert the Quick Mask into a Selection Marquee.
You can not use this refined Selection Marquee to cut or copy the selected
picture area into another photograph or do any PhotoShop editing or filter
operation in that selected part.
 |
 |
|
Before
direct from selection by Pen Tool
|
After
Refined by using Quick Mask.
|
Extract
Extract is an wonderful tool available in PhotoShop. It is available as
built-in Filter. The only downside is, it works only in 8bit per channel
mode. The Montage Tutorial contains
a detailed description how to use Extract.
|