|
Few days ago we were travelling through the highway 9 in the Santa Cruz
mountain. The narrow windy roads jig jagged though the tall Redwood trees.
The canopy created a perpetual shade. Sun light could only peeped in as
narrow pencil of lights at some places. The trees looked gorgeous and
I wanted to take a picture of those majestic trees along with my Mom as
a visual reference of scale. But there were lots of photographic challenges-
- Trees were too tall to capture with a normal lens, so I have to use
a 17mm ultra wide angle lens
- Light was very dim, so I need to use ISO400 with wide open f2 at 17mm,
which will create very soft grainy picture, which may be usable for
giant Redwood trees, but totally unacceptable for a human subject.
- Like all Ultra wide, my Sigma 17-35mm suffers more distortion and
aberration at the edges and I was planning to place my Mom exactly there!
So in short, I can not shoot my Mom with 17mm wide.
- Due to low available light, I have to use fill-in flash to shoot my
Mom, but same I can not use for the Redwood trees.
It was clear to me that if I want my composition, I can not do it in
Camera. The other option was to do a photo montage in digital darkroom.
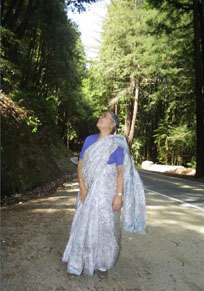
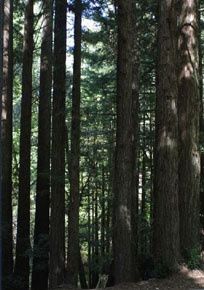
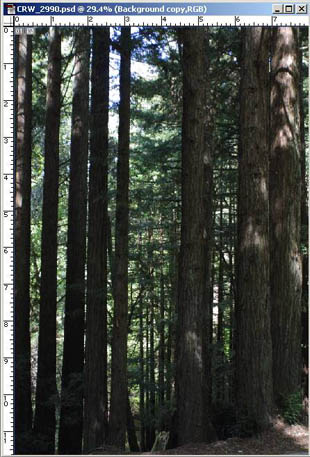
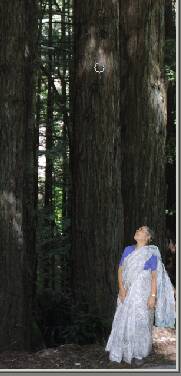
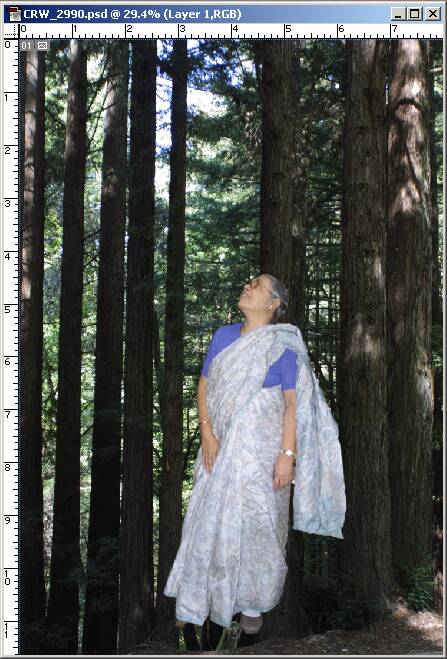
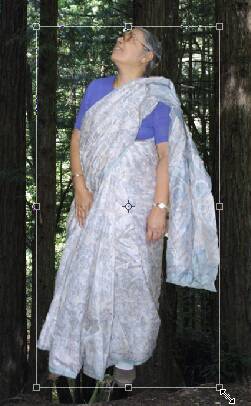
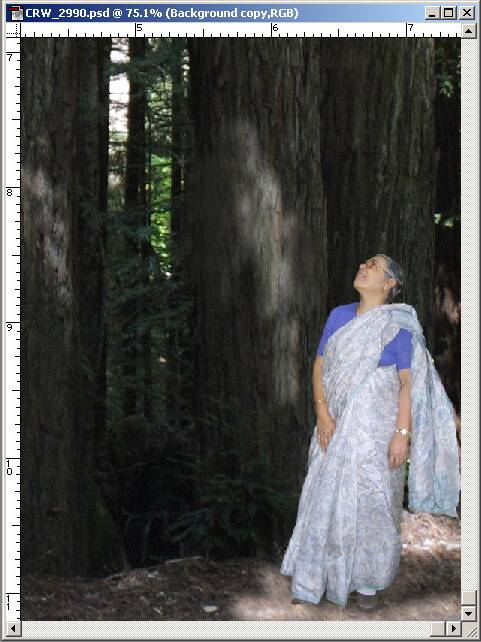
So I started to plan the montage shots. I needed two photographs, one
of the redwood tree, and other one was a full height properly exposed
shot of my Mom. I used 17mm to take the Redwood photograph and a 35mm
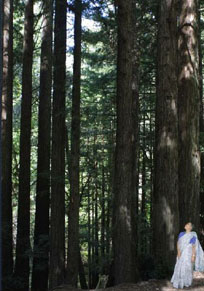
to take her low angle shot. The third picture shows the final result after
the montage, the composition I had visualized.
I will explain the technique I have used here.
With Photoshop there are many ways to do a thing and this is one of them.
You may know a faster way of achieving the result and I would love to
know about it 
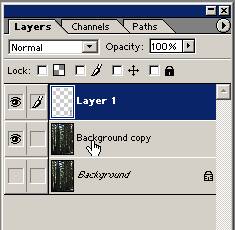
- I have opened both the pictures in photoshop and created a duplicate
layer for both of them. This is very important. The cardinal rule in
Photoshop is never work on the original photograph. Always create a
duplicate layer and work on that.
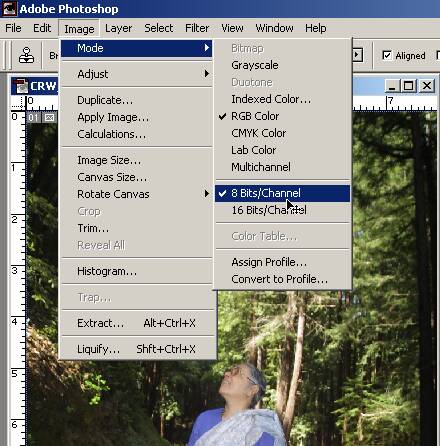
- Selected the first picture and then selected the Image>Mode>8
Bit/Channel command as shown below. This is a drawback in Photoshop,
that many tools can not work with 16 bit mode. However, human eye can
hardly perceive any difference between 8 bit and 16 bit mode. Moreover
photo quality Ink Jets can not even print 16 bit/Channel information.
- After converting to 8 bit/Channel, select Image>Extract
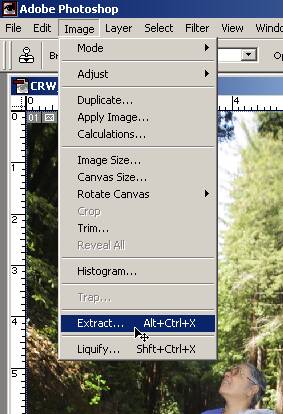
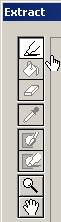
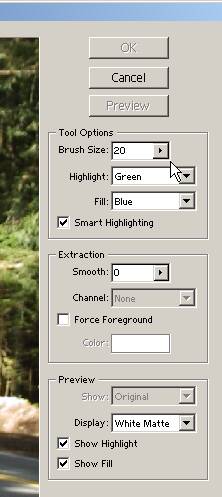
- This will open the Image Extract window with separate tool bars and
options. Select edge highlighter tool and on the Tool options, select
Smart Highlighting. Use magnifying glass to zoom in the image, hand
tool to mode the image and the Brush Size to make the highlighter bush
big or small.
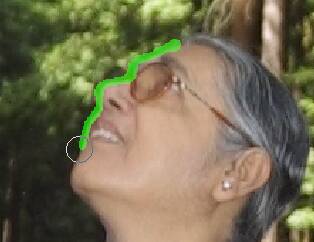
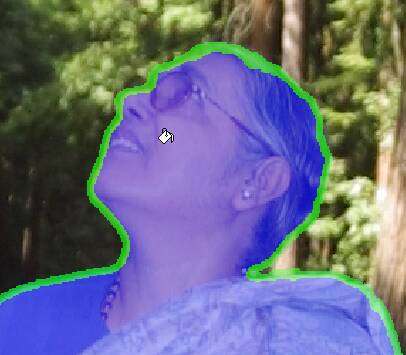
- Now I started carefully highlighting the border of the figure. The
Smart Option helps me to track the border by edge detecting algorithm.
The highlighted part appeared a thick green line. This line covered
some part of the figure as well as the background. This is ok, in-fact
it should be that way only.
- Once the highlighting is complete, select the fill tool and click
inside of the figure. This filled the figure with transparent blue ink
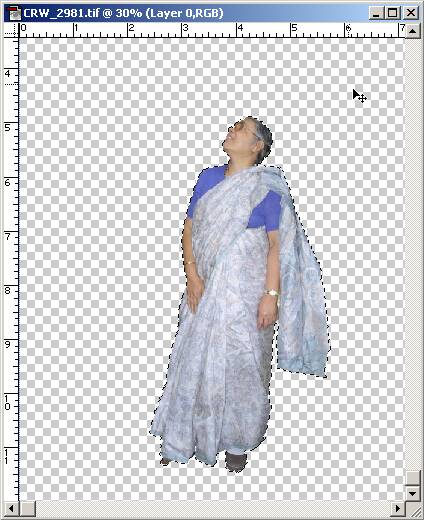
- Pressing OK button created the extracted image from the background,
which I would use for montage on the second photograph. I copied this
image in the clipboard.
- I had selected the Redwood picture and pasted the extracted image
in it.
- The pasted image was too big, and required rescaling. I selected the
Edit>Transfor>Scale.
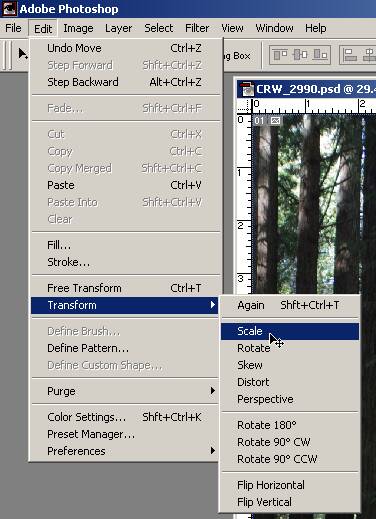
- This created a scalling marquee around the image.
I kept shift key pressed and dragged from a corner to scale it while
preserving the aspect ratio.

- The image still looked incomplete and unnatural with subject to brightly
illuminated. I needed to create some illusion of sunlight falling on
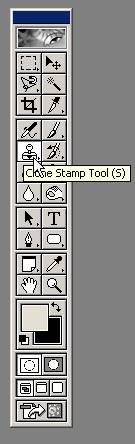
the subject and casting shadow behind her. For this purpose, Rubber
Stamp or Clone Stamp tool came handy. Before using the tool, I switched
the working layer to the Redwood Tree duplicate layer
I selected the clone source from the lighted portion of the bark
and created some highlight at the lower portion near the subject
- I kept on working the same way for the ground highlight. This time
I chose the clone source from the highlighted ground. For shadow, I
selected clone source from the shadowed ground. The picture below will
show the end result of cloning
- And here is the final output

|