|
Many times incorrect exposure and limited exposure
latitude of Digital Camera ruin a perfect composition. Unlike
negative films, Digital Camera has very narrow exposure latitude, so correct
exposure is all the more critical for a Digital Camera than a conventional
negative film loaded camera. The situation worsens if the scenery has
very bright highlights as well as deepest dark shadows. No digital camera
can ever capture that wide gamut of tonal variation.
There are however several techniques to tackle such issues. One technique
is to place the camera on a tripod and expose three frames, one with exposures
for the highlight, one for the mid-tone and the last one for the shadows.
Then combine these three with PhotoShop by using layer masks. This works
fine so long the subjects in the scene remains static across the three
exposures. But for moving subjects or hand held shot this technique can
not be employed. Moreover, you may have just a single improperly exposed
shot, which you may like to recover. Here, I will explain a technique
how you can do so.
 |
 |
|
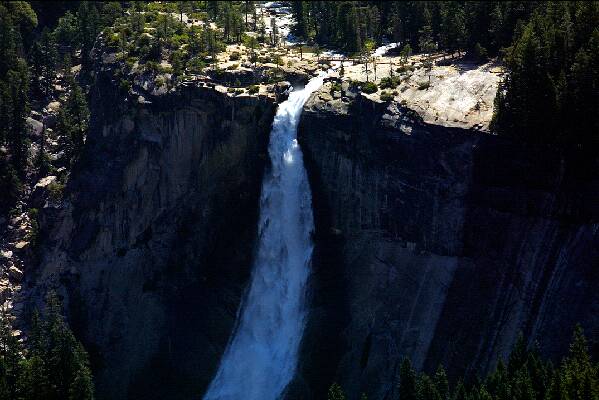
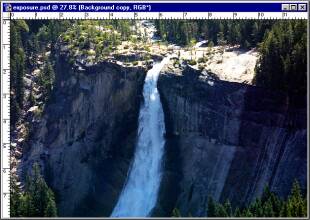
Before
|
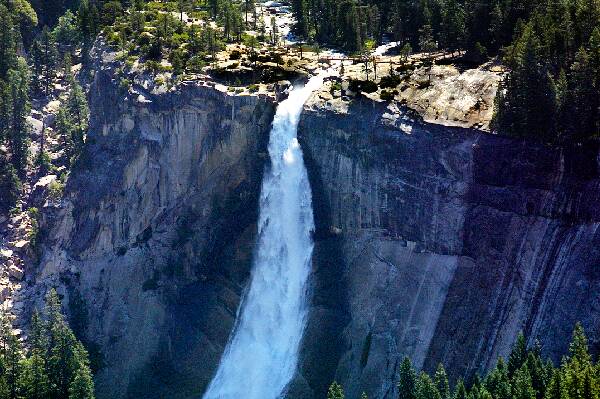
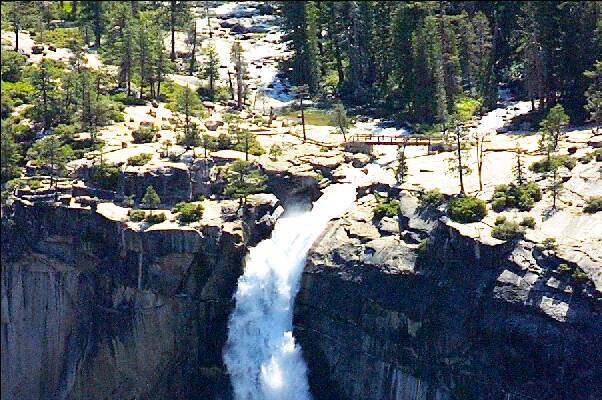
After
|
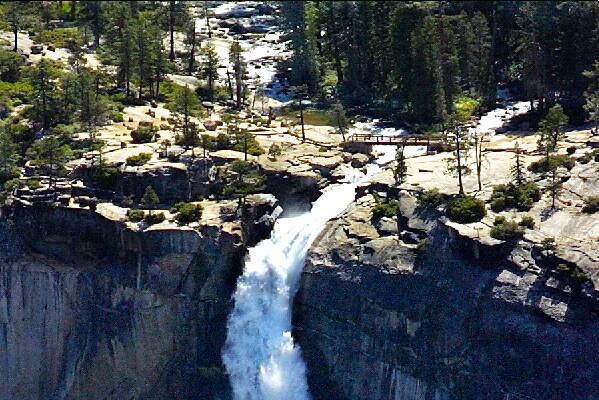
Look at the sample picture above. This is probably Vernal falls I took
with Canon 300mm Lens from Glacier Point at Yosemite on a very sunny morning.
The glaring sunlight and deep black shadows were too much for my D30 sensor
to handle. The non linear Tiff output from the RAW image was now where
near showing the exquisite color and texture of the granite rock face.
All were obscured under deep black shadow. A 15 minutes retouching in
my Digital Darkroom recover much of the hidden color and tonal variation.
in PhotoShop. The technique involves layer blending and layer masking,
which I will explain in step by step manner.
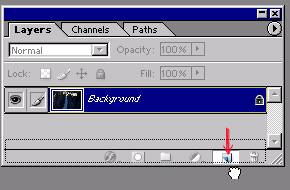
- Load the photo in PhotoShop and make two copies of the original photograph
by dragging the layer to the new layer button in the layer window or
by clicking the Layer/New/Layer or Shift+Ctrl+N button.
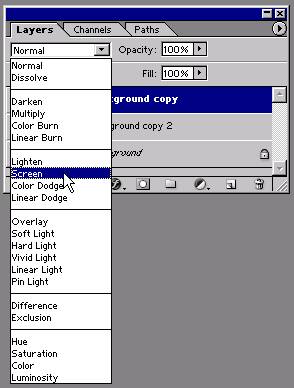
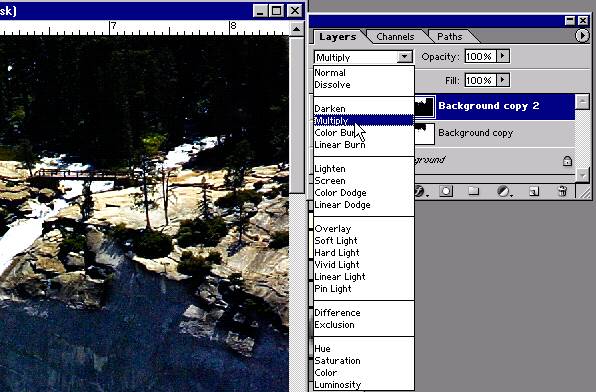
- Now select the top most layer
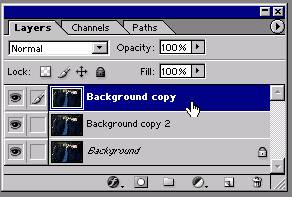
- and open the layer blending option combo box. Select screen blending
option from it.
- You will immediately see the picture gets lightened noticeably.
We can now see the granite rock face details more clearly.
- But unfortunately the entire picture has become lightened, which has
resulted washing out the highlight details as shown below. We definitely
do not want this to happen. So let us create a layer mask to mask off
the highlighted region.
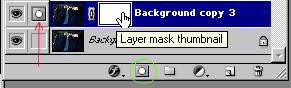 In the Layer
window, select the layer with the screen blending and click the layer
mask button shown as the green circle. This will create a layer mask,
which will appear as a white rectangle beside the layer thumbnail picture
in the layer window. Now select the mask by clicking on the white rectangle
and ensure it is selected by checking the mask icon in the box as shown
by the red arrow. In the Layer
window, select the layer with the screen blending and click the layer
mask button shown as the green circle. This will create a layer mask,
which will appear as a white rectangle beside the layer thumbnail picture
in the layer window. Now select the mask by clicking on the white rectangle
and ensure it is selected by checking the mask icon in the box as shown
by the red arrow.
- Select black ink and a suitable round brush and keep on painting on
the highlighted region. Do not worry, no black ink will be shown on
your picture as you are now painting on the mask. You will see like
magic, the original darker highlighted regions are reappearing. Keep
on working till you recovered all the blown out highlights and faded
out foliages. After finishing with the mask, the blown out region will
look like this
- Now you can simply create another copy of the masked and screen-blended
layer if you further want to enhance you shadow details. Each copy will
make the shadow area lighter.
- Now it is time to enhance the highlighted region. For this we make
a copy of the newly created masked and screen blended layer.
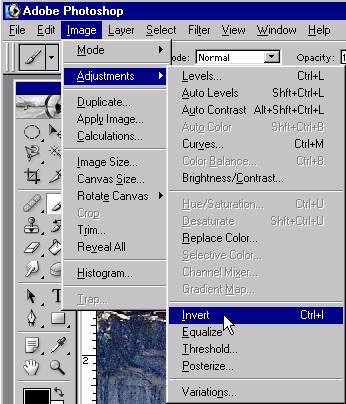 Keep the mask selected and click on Image/Adjustment/Invert option,
or press shortcuit Ctrl+I. This will invert the mask.
Keep the mask selected and click on Image/Adjustment/Invert option,
or press shortcuit Ctrl+I. This will invert the mask.
- Now the fun starts. Make this layer blending option as Multiply. Voila!
The highlighted regions suddenly go dark as black.
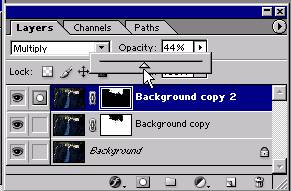
- Adjust the opacity slider of this Multiply layer till you get the
proper highlights.
- As a finishing touch, select the layer mask of the multiplied layer
and mask the foliages with black ink, so that they do not appear too
dark.
There you go with your finished photograph, which looks so much better
than the original one!
|